How to use our free invite campaigns
Promote yourself at the 48th Turbomachinery & 35th Pump Symposia with our FREE PASS Tools!
Increase your referrals by providing our personalized, beautiful and trackable marketing assets. Utilize your free Partner Dashboard (links to your partner dashboard were sent in an email)! You can upload an email list, send an email invite to that list through this dashboard. You can also come back to this dashboard to check your stats on your email send(s) or see any leads that you generated.
Invite Emails
Partner Dashboards
You can send from your Feathr Partner Dashboard with one-click or download the template and share marketing emails to your audiences.
Use our all-in-one dashboard to customize, download, share, and track each of your referral assets. From the dashboard, partners are able to see how many emails you have sent, how many times those emails have been opened, and how many of those emails received clicks once open.
Get Started
You should have received an email with a link to your Feathr Partner Dashboard where you can access your own custom invite materials. If you haven’t received a link to your Partner Dashboard and believe you should have, please contact us, we may have sent the link to your colleague or we may be waiting to share the details.
Using Your Partner Invite Dashboard
How to access and use the email templates created for you to share your participation at the Turbomachinery & Pump Symposia.
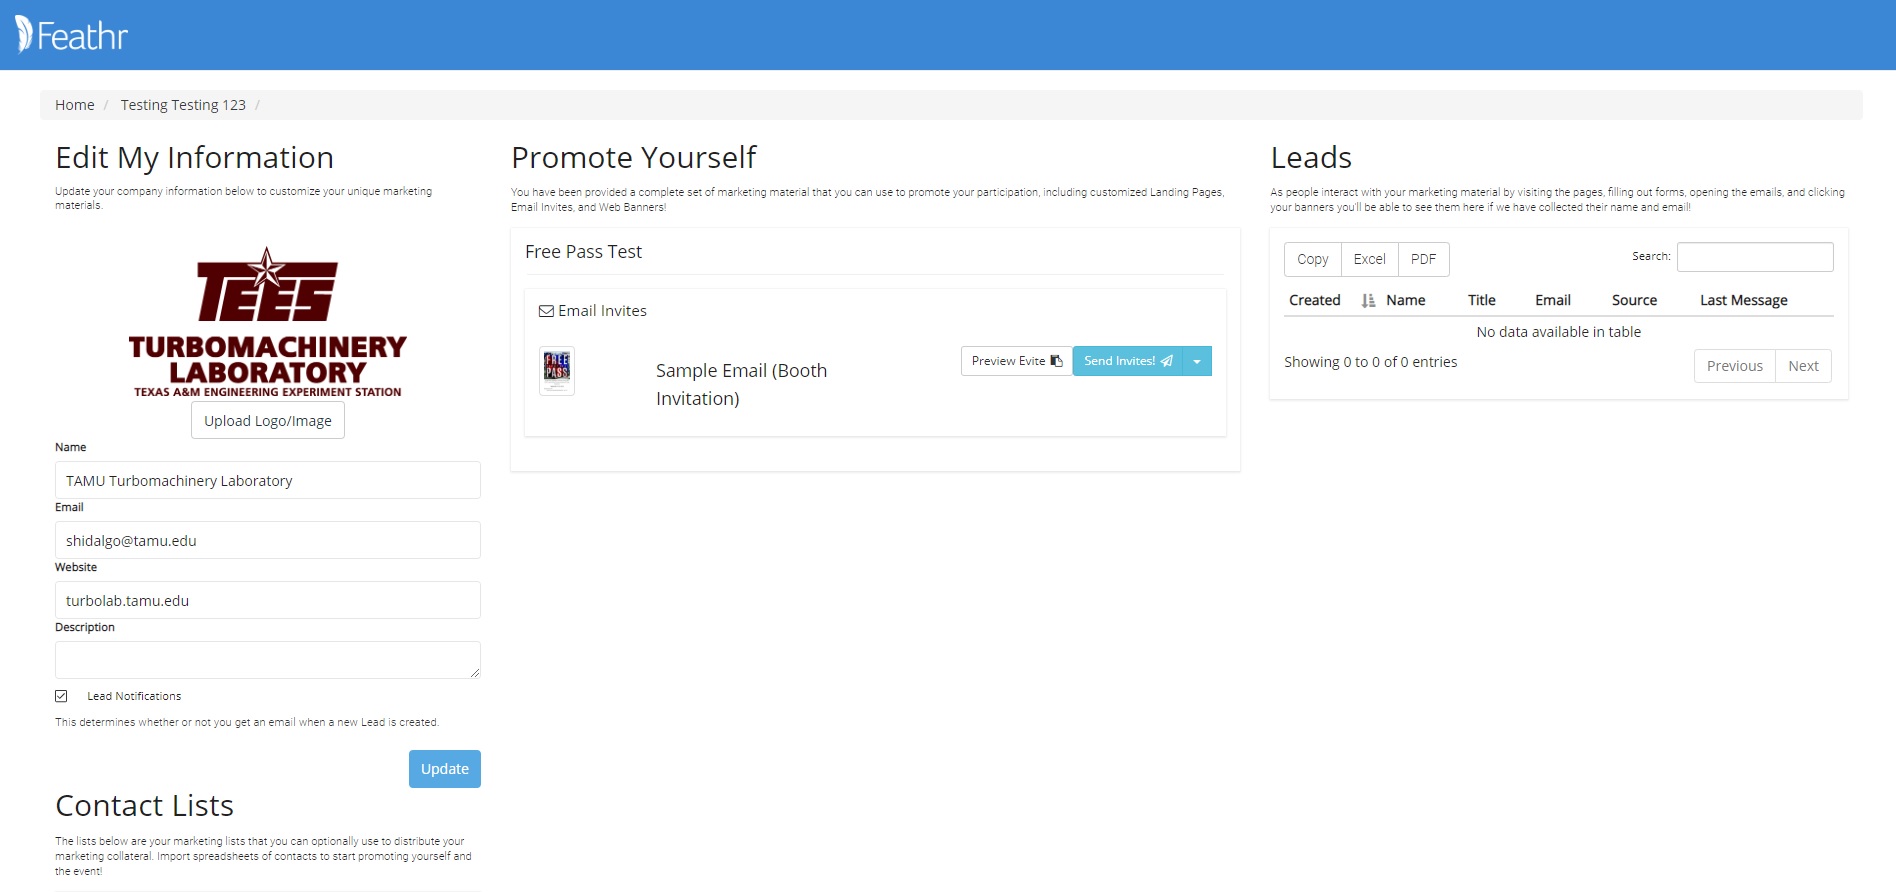
You should first see your Partner information on the left side of the page. This includes your basic information that can be edited.
Basic Partner Information
- Upload Logo: Upload your logo or headshot photo by clicking “Upload Logo” and selecting the image from the file picker. This image may appear on your Invite Page, in the Email(s), or on your Banner. (Accepted file types are .png and .jpeg). We recommend that your logo is no larger than 300px tall or wide to prevent the logo from appearing oversized on your templates.
- Partner Name: You can edit your name, whether it be the name of your company, or your own name, and this may also appear on your Invite Page, in the Email(s), or on your Banner.
- Email Address: This is who the Partner Dashboard and Invite Page links are sent to. More than one email address can be added if separated by a comma.
- Website: You can add or edit your company or personal website, which may also appear on your Invite Page, in the Email(s), or on your Banner.
- Description: Add or edit a brief description of yourself or your company, or include your session information, which may also appear on your Invite Page, in the Email(s), or on your Banner.
- Lead Notification: You have the option to choose whether you would like to be emailed when a new Lead is created by checking the box
Note: Name and Email are required, but all other information is optional, and what appears on your Invite email is the template we created for you.

Contact List(s)
When you’re done editing your information, move to the next section on the right side of the page. Here, you have the option to upload your prospects list(s) and send out an email invitation (in the next step) using the branded, personalized template we created for you. You will be able to see reporting about the successful deliveries, opens, and clicks for your messages.

To upload your email list:
- Select the ‘Import List’ button to the right.
- Once you’ve read the welcome message, click Next to go to Step 2.
- Select an Excel spreadsheet of the list you want to upload. The list should only have two columns: Name and Email. Each column MUST be filled out in order to import the list correctly. For example, you cannot just have an email address without a name, or vice versa.
Note: Name should be in First Last format. Each column/field must be filled out or the import will not work correctly.

4. Click Select List and use the file picker to choose your list.
5. Click Next when you’ve chosen and uploaded your list.
6. Verify the information found in the email upload and make sure it looks correct.

7. Click Next to go to the last step.
8. Here you can change the name of the list you imported, if necessary. Otherwise, click Finish!

9. When you click Finish, the Import Modal will disappear, and you should see your list processing on your Partner Dashboard. Depending on the file size, it may take a few minutes to finish importing. When it’s done, it will have a green checkmark to the left.

10. You can click List Info to the right of your imported list to see more details about your import.

Email Invites
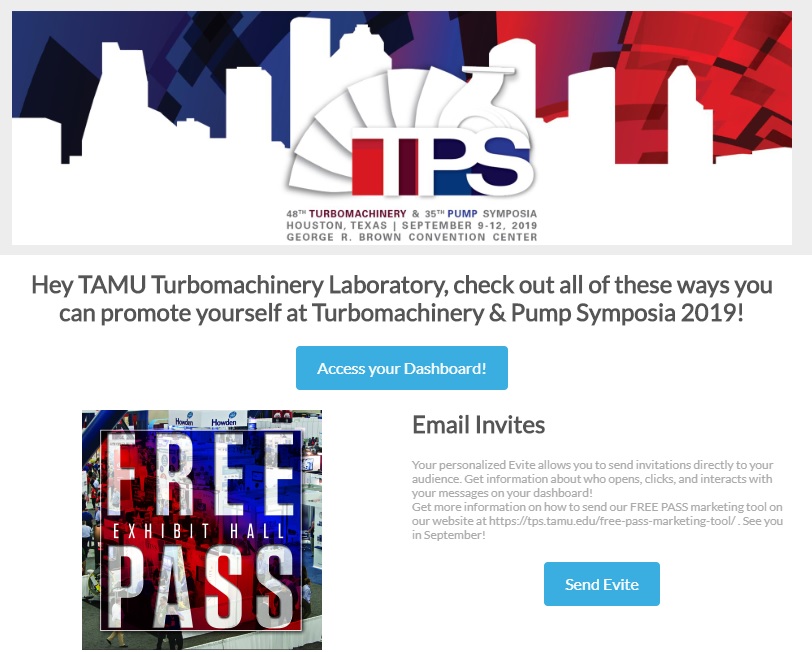
After you’ve uploaded your lists in the previous step, now you can send those contacts email invitations! Email invites are a template we created for you which populates with your information. You can use the email sending tool through the Dashboard, or export the Email HTML and send it to your contacts using your own email provider.
1. Click ‘Preview Evite’ to see what the email looks like populated with your information.
2. If you want to send the email using your own email provider, click the drop-down arrow next to Send Invites on the right, and select ‘Export Evite’.

3. This will download the HTML file into your downloads section. Copy/Paste the HTML in your email provider and send it!
4. To send the email through the Partner Dashboard, select the Send Invites button.
5. A popup modal will appear where you can edit the email settings before sending.
6. Select your Target Contact List — most likely the one you just uploaded.
7. Type in the “from” email address. This can be either a personal email address or an official company email. Note: Make sure it’s a real email address, as your contacts may respond!
8. You can keep the email’s subject, or make changes yourself.
9. Select the scheduled send date. This is an optional setting that will schedule the delivery of this message. Your invite will be delivered the morning of the date you choose. If you leave this empty your invite will start going out immediately.

10. Click Send when finished!
11. A popup modal will appear to let you know your email is in queue.

Note: After requesting an email invite to be sent, it will be “processed” and delivered at the next optimal window (Typically between 10am and 12pm on the next available business day). If during the processing or delivery an error is discovered, the status icon will change to a red triangle, and you can click the “Info” button to see the issue.
12. You will see your email send processing on your Partner Dashboard. Once it’s been sent, a green checkmark will appear next to the send. You can then see the opens, clicks, and successful sends under Stats.

Leads
You have the ability to keep track of any Leads that are generated by participating in the campaign. Leads are created when a person, that Feathr has contact information for, does something substantial like filling out a form or clicking on a button using your Invite Material. You have the ability to export the list as a spreadsheet or PDF.

Note: A person will not appear as a lead if they are labeled as ‘anonymous’.
Invite Partner Dashboard Overview
You should now how a better understanding of how to utilize your Invite Partner Dashboard! You can upload an email list, send an email invite to that list through this page. You can also come back to this page to check your stats on your email send(s) or see any leads that you generated.
Common Questions
Why haven’t I received the link to my Partner Dashboard?
Partner Dashboard links are sent by the event organizer only. If you haven’t received a link to your Partner Dashboard and believe you should have, please contact us, we may have sent the link to your colleague or we may be waiting to share the details.
Video Walk-through: Using your Invite Dashboard
For a video walk-through of how to use your Invite Dashboard and the marketing materials you can find there, check out the Feathr video below.


